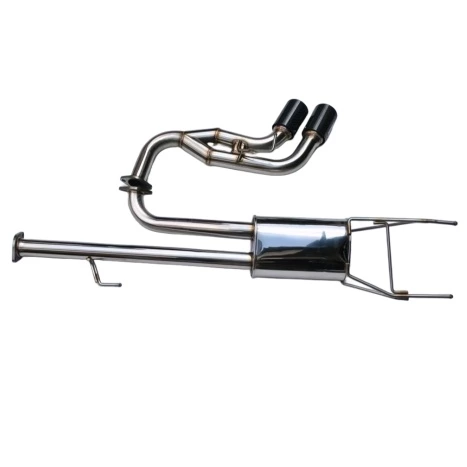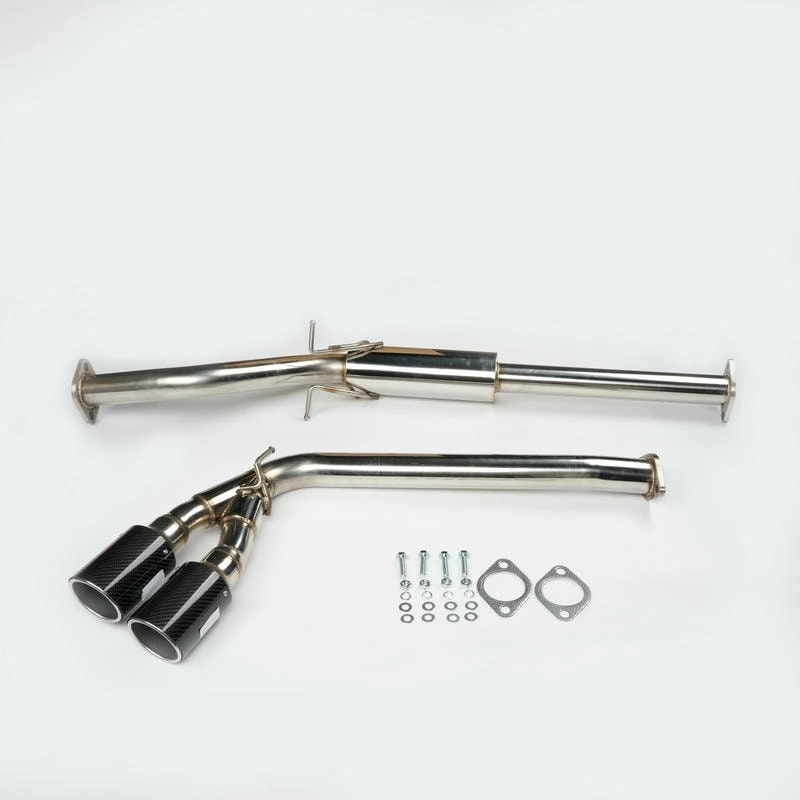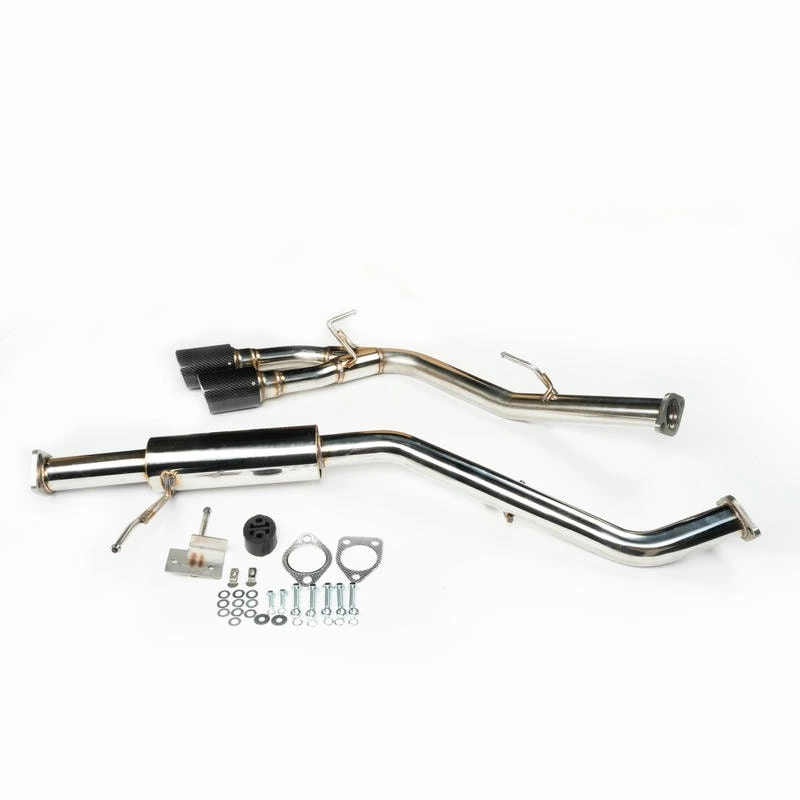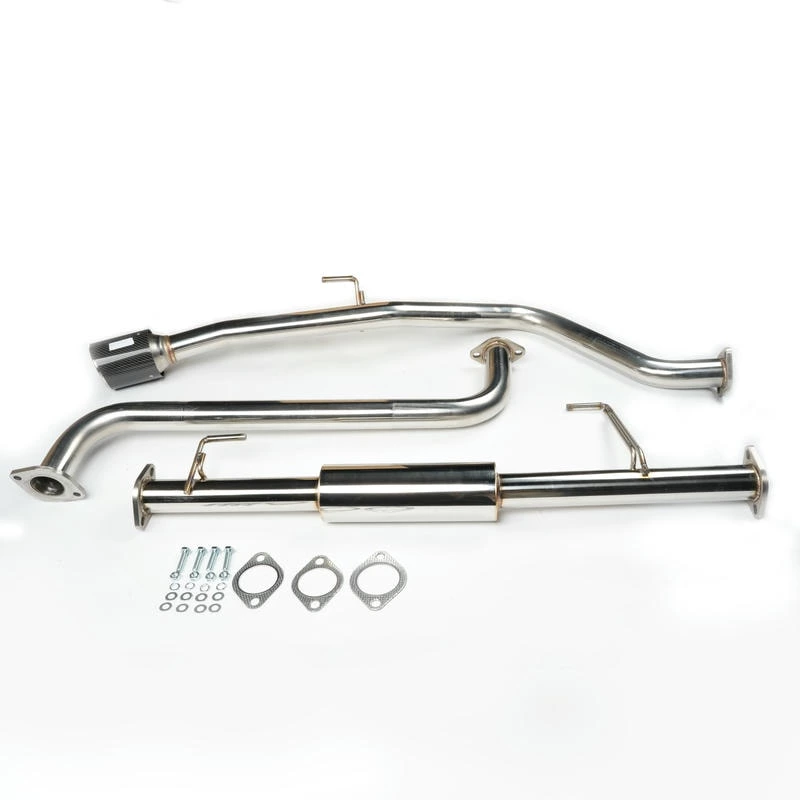
How to Join Two Exhaust Pipes: Clamps, Sleeves or Welding?
Joining two exhaust pipes correctly is important for maintaining a secure connection, preventing exhaust leaks, and keeping the pipe properly aligned under the vehicle. The best connection method depends on whether the pipes have the same diameter, whether one pipe can slide over the other, and whether the joint needs to be removable later.
There is no single method that works best for every exhaust pipe. Two equal-diameter pipes joined end to end may use a butt-joint band clamp, while overlapping pipes can use a lap joint or sleeve connection. Flanges and V-band connections are useful when the pipe needs to be removed for service, while welding creates a more permanent joint.
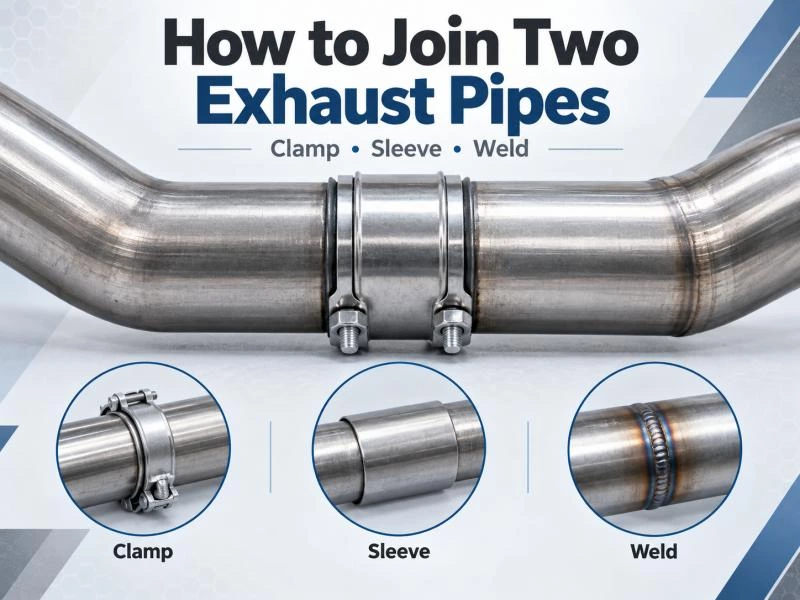
Before deciding how to join two exhaust pipes, always confirm the pipe diameter, connection style, alignment, and condition of both pipe ends. A connection that is too loose, misaligned, or matched with the wrong clamp can lead to leakage, vibration, and installation problems.
If the existing pipe is damaged or does not match the required dimensions, modifying the joint is not always the best solution. A correctly sized replacement or custom exhaust pipe can provide better fitment for vehicle-specific applications.
What Is the Best Way to Join Two Exhaust Pipes?
The best way to connect two exhaust pipes depends mainly on how the pipe ends meet. Start by checking whether the two pipes are the same outside diameter, whether one end is expanded to fit over the other, and whether the connection needs to remain removable.
Quick answer:
- Two pipes with the same outside diameter: a butt-joint band clamp is commonly used for an end-to-end removable connection.
- One pipe slides over the other: use a lap-joint clamp or suitable sleeve connection.
- Two pipes with different diameters: an exhaust reducer, adapter, or expanded pipe end may be required.
- Connection needs frequent removal: a flange or V-band connection may be more suitable.
- Permanent connection: welding can provide a rigid joint when properly prepared and fabricated.
| Joining Method | Typical Pipe Arrangement | Removable? | Common Application |
|---|---|---|---|
| Butt-Joint Band Clamp | Same-diameter pipes placed end to end | Yes | Replacement and removable exhaust sections |
| Slip Fit / Lap Joint | One pipe overlaps the other | Yes | Common exhaust pipe connections |
| Sleeve / Coupler | Two pipe ends joined through a separate connector | Usually | Repair and pipe-section connections |
| Flange / V-Band | Matching connection ends | Yes | Vehicle-specific or serviceable connections |
| Welding | Pipe ends permanently joined | No | Permanent fabrication and custom exhaust work |
Start With the Pipe Diameter and Joint Type
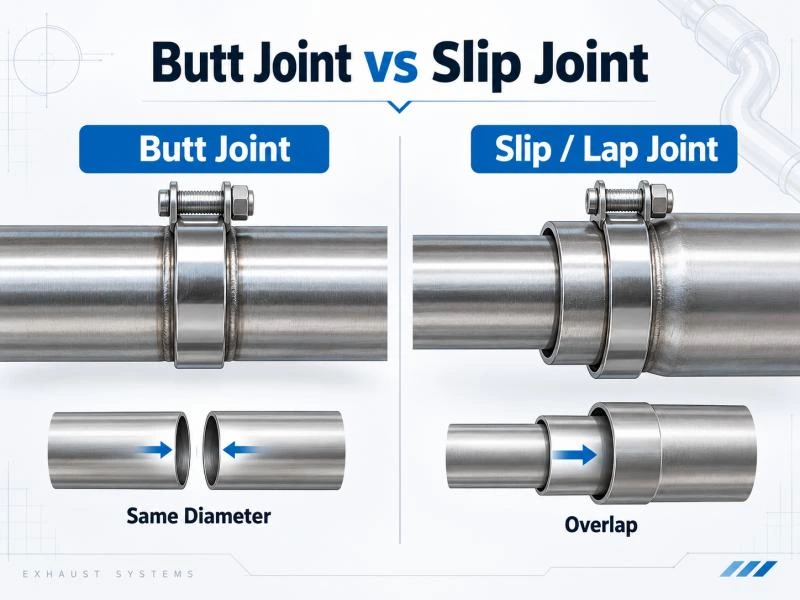
Pipe diameter is one of the first measurements to check. Exhaust tubing is commonly identified by its outside diameter (OD), so two pipes described as the same size may be designed for a butt joint rather than for one pipe to slide directly inside the other.
For example, if both exhaust pipes have the same outside diameter, they normally cannot create a slip-fit connection without an expanded end or an additional sleeve. A correctly sized butt-joint band clamp can bridge the seam between the two aligned pipe ends without requiring one pipe to overlap the other.
If one pipe end has already been expanded, the smaller pipe can slide into the larger end to create an overlapping connection. A lap-joint clamp can then secure the overlap. This arrangement differs from a butt joint, so choosing the correct clamp style matters.
Removable vs Permanent Connections
Another important question is whether the exhaust pipe may need to be removed again. Clamps, sleeves, and flange connections are generally easier to disassemble, which can be useful when replacing or servicing individual exhaust sections.
Welding creates a permanent connection and removes the need for a separate clamp at the joint, but later removal normally requires cutting the pipe or weld. For this reason, welding is not automatically the best choice for every exhaust connection.
Choose the connection method according to the joint—not simply according to which clamp or tool is available. Pipe diameter, overlap, alignment, serviceability, and vehicle fitment should all be confirmed first.
Why Proper Alignment Matters
Before any clamp, sleeve, flange, or weld is applied, the two exhaust pipe sections should line up correctly. Forcing misaligned pipes together can place unnecessary stress on hangers, flanges, and other exhaust components.
The joint should also provide sufficient clearance from the chassis, suspension, heat shields, and other nearby components. If the original pipe is bent, shortened, or heavily corroded, replacing the damaged section with a correctly shaped exhaust pipe may be more reliable than forcing the connection into position.
Method 1: Join Exhaust Pipes With a Butt-Joint Band Clamp
A butt-joint band clamp is one of the most practical ways to connect two exhaust pipes that have the same outside diameter. Instead of sliding one pipe inside the other, the two pipe ends are positioned directly against each other and the clamp bridges the joint.
This method is especially useful when the exhaust sections need to remain removable. Compared with welding, a band-clamp connection can usually be disassembled later for repair, replacement, or inspection without cutting the pipe.
When Should You Use a Butt-Joint Clamp?
A butt-joint clamp works best when both exhaust pipe ends are straight, clean, and closely matched in diameter. The pipe ends should meet evenly without a large gap or visible misalignment.
A butt-joint band clamp is suitable when:
- Both exhaust pipes have the same outside diameter
- The pipes meet end to end rather than overlapping
- You want a removable connection
- The pipe ends are in good condition
- The exhaust sections can be aligned accurately
How to Install a Butt-Joint Band Clamp
- Check the pipe diameter.
Confirm that both exhaust pipes have the same outside diameter and that the clamp matches the tubing size. - Clean the pipe ends.
Remove rust, dirt, burrs, and loose material around the joint area. - Align the two exhaust pipes.
Position the ends as evenly as possible and make sure the surrounding exhaust system is not under excessive stress. - Center the band clamp over the seam.
The joint between the two pipes should sit close to the center of the clamp. - Tighten the clamp evenly.
Tighten both sides gradually according to the clamp manufacturer's requirements rather than fully tightening one side first. - Check alignment and leakage.
After installation, confirm that the pipe remains correctly positioned and inspect the connection for signs of exhaust leakage.
| Butt-Joint Clamp Advantage | What It Means |
|---|---|
| Removable | The pipe sections can usually be separated again for maintenance or replacement. |
| No Pipe Overlap Required | Useful when both pipes have the same outside diameter. |
| Wide Clamping Area | The band distributes clamping force around a larger section of the pipe. |
| Minimal Pipe Deformation | When installed correctly, it can avoid some of the local crushing associated with narrower clamp designs. |
Common Butt-Joint Clamp Problems
A butt-joint connection depends heavily on accurate pipe alignment. If the pipe ends are uneven, badly rusted, or different in diameter, tightening the clamp alone may not create a reliable seal.
Common problems include:
- A gap between the two pipe ends
- Misaligned exhaust sections
- Incorrect clamp diameter
- Damaged or distorted pipe ends
- Insufficient tightening or uneven clamp pressure
If the ends cannot be aligned properly, a sleeve, expanded pipe end, or replacement exhaust pipe may provide a better solution.
Method 2: Use a Slip-Fit or Lap-Joint Connection
A slip-fit connection is used when one exhaust pipe slides over the end of another pipe. This creates an overlapping joint rather than an end-to-end connection.
The overlapping section is then secured with a suitable exhaust clamp. Depending on the pipe design, this may be a lap-joint band clamp, U-bolt clamp, or another clamp specifically designed for overlapping exhaust tubing.
How a Slip-Fit Exhaust Joint Works
For a slip-fit connection, one pipe end must have a larger inside diameter than the outside diameter of the pipe that slides into it. This can be achieved with a factory-expanded pipe end, a formed connection, or an appropriately sized sleeve.
Important: Two exhaust pipes with exactly the same outside diameter normally cannot slide directly into each other unless one pipe end has been expanded.
Once the smaller pipe is inserted into the expanded end, the overlapping area provides mechanical support and helps maintain alignment. The clamp then compresses the outer pipe around the inner pipe to secure the connection.
How Much Should Exhaust Pipes Overlap?
The amount of overlap depends on the pipe design, clamp type, and application. The connection should provide enough engagement to keep the pipes aligned and give the clamp sufficient surface area to secure the joint.
The clamp should be positioned over the overlapping section rather than at the very edge of the expanded pipe. Incorrect clamp placement can reduce sealing performance and may allow the joint to move during vehicle operation.
Advantages of a Slip-Fit Connection
- Helps maintain pipe alignment
- Provides a larger contact area between pipe sections
- Can be installed without welding
- Can often be disassembled for future maintenance
- Commonly used for modular exhaust sections
Butt Joint vs Slip Joint
| Feature | Butt Joint | Slip / Lap Joint |
|---|---|---|
| Pipe Position | Ends meet directly | One pipe overlaps the other |
| Same OD Pipes | Suitable | Requires one end to be expanded |
| Typical Clamp | Butt-joint band clamp | Lap-joint or suitable exhaust clamp |
| Alignment Support | Depends strongly on pipe positioning | Overlap helps maintain alignment |
| Removable | Yes | Usually |
When Is a Slip-Fit Joint Better?
A slip-fit connection can be a good choice when the exhaust system is designed with overlapping sections or when one pipe end can be expanded to accept the next section.
It is particularly useful for replacement exhaust components that need to be assembled in sections while still allowing later removal. However, the pipe diameters, overlap length, and clamp type must match correctly.
If the original exhaust pipe does not provide enough overlap or the ends are heavily damaged, using an accurately sized replacement exhaust pipe can provide a more reliable connection than forcing mismatched sections together.
Method 3: Join Exhaust Pipes With a Sleeve or Coupler
An exhaust sleeve or coupler is another practical way to join two exhaust pipes without directly welding the pipe ends together. The connector fits over, or between, the two exhaust sections and creates a separate joining point.
Sleeves are especially useful when the original exhaust pipe does not have an expanded end or when two sections need additional support at the connection. They can also be used during exhaust pipe replacement when the new and existing sections need to be joined without modifying a large portion of the system.
How Does an Exhaust Sleeve Connection Work?
A sleeve connection typically uses a short section of tubing that overlaps both exhaust pipe ends. The sleeve is then secured with clamps or another appropriate fastening method.
The key requirement is correct sizing. The sleeve must match the outside diameter of the exhaust pipes closely enough to create a secure connection without excessive clearance.
A sleeve or coupler can be useful when:
- Two pipe sections need to be connected without welding
- The existing pipe ends cannot overlap directly
- A damaged exhaust section has been cut out and replaced
- The connection needs to remain removable
- Additional alignment support is required between two pipe sections
How to Install an Exhaust Pipe Sleeve
- Measure both exhaust pipes.
Confirm the outside diameter before selecting the sleeve. - Prepare the pipe ends.
Remove heavy rust, burrs, and loose material that could prevent the sleeve from sitting correctly. - Position the sleeve over the first pipe.
Slide the connector far enough onto the pipe to allow the second section to be aligned. - Insert and align the second pipe.
Make sure both exhaust sections follow the correct routing underneath the vehicle. - Center the sleeve over the connection.
Both pipe ends should have sufficient engagement inside the connector. - Secure the connection.
Tighten the appropriate clamps evenly and verify that the joint remains aligned.
| Sleeve Connection Feature | Consideration |
|---|---|
| Easy Installation | Can join pipe sections without permanent welding |
| Removable | Useful when future exhaust service may be required |
| Alignment Support | Helps keep two pipe sections positioned along the same path |
| Size Sensitive | The sleeve must match the exhaust pipe diameter correctly |
Sleeve vs Slip-Fit Connection
A sleeve and a slip-fit joint may appear similar because both use overlapping sections, but the connection design is different.
With a slip-fit joint, one exhaust pipe end is expanded so the second pipe can slide directly inside it. A sleeve connection instead uses a separate connector between the two pipe sections.
| Feature | Sleeve / Coupler | Slip-Fit Joint |
|---|---|---|
| Separate Connector | Yes | No |
| Expanded Pipe End Required | No | Usually yes |
| Suitable for Same-Size Pipes | Yes, with the correct sleeve | Requires one end to be enlarged |
| Removable | Usually | Usually |
Method 4: Use a Flange or V-Band Connection
Flange connections are commonly used when two exhaust sections need a secure but removable joint. Instead of clamping directly around the exhaust tubing, matching flanges are attached to the pipe ends and then fastened together.
This design is particularly useful for vehicle-specific exhaust systems because the connection location, pipe angle, and mounting position can be controlled more precisely.
How an Exhaust Flange Connection Works
A conventional exhaust flange connection usually consists of two matching flange faces positioned at the ends of the exhaust pipes. Bolts or studs pull the flanges together, often with a gasket or sealing surface between them.
Correct flange alignment is important. Even if the exhaust pipes have the right diameter, incorrect bolt spacing, flange orientation, or pipe angle can prevent the sections from fitting together properly.
Flange connections are commonly selected when:
- The exhaust section needs to be removable
- A defined vehicle-specific connection point is required
- Precise pipe alignment is important
- The exhaust system is assembled from multiple sections
What Is a V-Band Exhaust Connection?
A V-band connection uses two matching flanges attached to the exhaust pipe ends. A V-shaped clamp fits around the outside of the flanges and pulls them together as the clamp is tightened.
Unlike a standard band clamp that compresses directly around the tubing, the V-band clamp acts on the flange profiles. This creates a compact removable connection that can be useful in applications where the exhaust section may need to be disconnected later.
Flange vs V-Band Connection
| Feature | Bolted Flange | V-Band |
|---|---|---|
| Connection Method | Bolts or studs | V-band clamp around matching flanges |
| Removable | Yes | Yes |
| Pipe-End Preparation | Matching flange required | Matching V-band flanges required |
| Typical Use | OEM and vehicle-specific exhaust connections | Compact serviceable exhaust connections |
Why Flange Position Matters
The flange is part of the exhaust pipe geometry, not simply an accessory added after the pipe is formed. Its position and angle must match the surrounding exhaust components.
For vehicle-specific replacement or custom exhaust pipes, manufacturers need to control:
- Flange orientation
- Bolt-hole position
- Pipe-to-flange angle
- Distance from nearby bends
- Overall connection location
If these dimensions are incorrect, the exhaust pipe may not align with the rest of the system even when the diameter and overall length are correct.
For OEM and custom exhaust pipes: Connection design should be considered together with pipe diameter, bend geometry, hanger position, and vehicle fitment.
Method 5: Join Exhaust Pipes by Welding
Welding creates a permanent connection between two exhaust pipe sections. Unlike clamps, sleeves, or flange joints, a welded connection is not designed to be removed during normal maintenance.
This method is commonly used when the exhaust pipe needs a rigid, compact joint or when a custom exhaust section is being fabricated as a complete assembly. However, welding quality is important because poor alignment, excessive heat, or incomplete weld penetration can create weak points or leaks.
When Is Welding a Good Choice?
Welding may be suitable when:
- A permanent exhaust pipe connection is required
- The pipe sections can be aligned accurately before welding
- The exhaust system does not need frequent disassembly
- A custom pipe section is being fabricated
- The material and wall thickness are suitable for the welding process
Basic Exhaust Pipe Welding Process
The exact welding process depends on the exhaust pipe material and manufacturing requirements, but the basic preparation steps are similar.
- Measure and prepare the pipe ends.
Confirm the diameter and cut the ends cleanly so they can be aligned accurately. - Remove rust, coating, and contamination.
The welding area should be clean enough to achieve a consistent joint. - Align the exhaust sections.
Make sure the pipe follows the correct routing before the joint is fixed permanently. - Tack weld the joint.
Small tack welds can hold the pipe in position while alignment is checked. - Complete the weld around the pipe.
Heat input should be controlled carefully, especially on thin-wall exhaust tubing. - Inspect the finished joint.
Check the weld for gaps, visible defects, and possible leakage points.
MIG vs TIG Welding for Exhaust Pipes
| Welding Method | Typical Characteristics | Common Use |
|---|---|---|
| MIG Welding | Fast welding speed and practical for many fabrication tasks | General exhaust repair and fabrication |
| TIG Welding | Greater control over heat and weld appearance | Stainless steel and higher-precision exhaust fabrication |
Neither process is automatically better in every situation. The appropriate method depends on the pipe material, wall thickness, production requirements, and the level of weld control required.
Advantages and Limitations of Welding
| Advantages | Limitations |
|---|---|
| Permanent connection | Difficult to remove later |
| No separate clamp required at the joint | Requires welding equipment and skill |
| Compact connection | Incorrect heat input can damage thin tubing |
| Suitable for custom fabrication | Future replacement may require cutting |
Important: Welding should not be used to compensate for poor pipe alignment. The exhaust sections should fit correctly before the joint is welded.
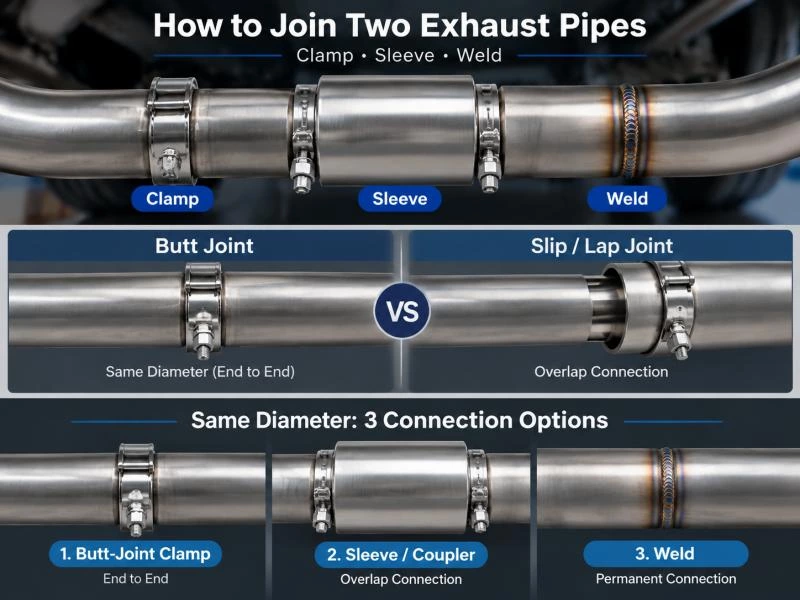
How to Join Two Exhaust Pipes of the Same Diameter
Joining two exhaust pipes with the same outside diameter is a common situation during replacement or custom fabrication. Because both pipes have approximately the same outside dimension, one pipe normally cannot slide directly inside the other.
The most suitable connection method depends on whether you want a removable or permanent joint.
| Method | Same-Diameter Pipes | Removable? | Typical Situation |
|---|---|---|---|
| Butt-Joint Band Clamp | Yes | Yes | End-to-end replacement connection |
| Sleeve / Coupler | Yes | Usually | Connecting two straight pipe ends |
| Expanded Slip Fit | Yes, after expanding one end | Yes | Overlap-style connection |
| Welding | Yes | No | Permanent fabrication |
Option 1: Butt the Pipes Together
If both pipes are the same diameter and have clean, straight ends, they can be aligned end to end and secured with a correctly sized butt-joint band clamp.
This is one of the simplest removable solutions because no pipe expansion is required.
Option 2: Use a Sleeve or Coupler
A correctly sized sleeve can fit over both same-diameter pipes and create an overlapping connection around the joint. This can provide additional alignment support compared with simply placing the pipe ends against each other.
The sleeve must be selected according to the actual outside diameter of the exhaust tubing. A connector that is too large may not seal correctly, while an undersized sleeve may not fit over the pipe.
Option 3: Expand One Pipe End
Another approach is to expand one exhaust pipe end so the second pipe can slide inside it. This changes the connection from a butt joint into a slip-fit or lap joint.
After the pipe is expanded, the overlapping section can be secured with an appropriate lap-joint clamp or another suitable connection method.
Option 4: Weld the Two Pipes
If the connection does not need to be removed later, the two same-diameter pipes can also be welded together. The pipe ends should be aligned carefully before tack welding and final welding.
For stainless steel exhaust pipes or thin-wall tubing, controlled welding is particularly important to reduce distortion and maintain a consistent pipe shape.
Quick selection guide:
- Need future removal? Use a butt-joint clamp or sleeve.
- Want an overlapping connection? Expand one pipe end and create a slip fit.
- Need a permanent connection? Welding may be appropriate.
Measure Before Choosing the Connection
Before connecting same-diameter exhaust pipes, confirm the actual outside diameter rather than relying only on a nominal pipe size. Small dimensional differences, damaged pipe ends, or previous deformation can affect clamp and sleeve fitment.
If you are unsure about the correct dimensions, see our guide on how to measure an exhaust pipe before selecting a clamp, sleeve, or replacement section.
How to Join Exhaust Pipes of Different Diameters
Joining exhaust pipes with different diameters requires a transition between the two pipe sizes. Trying to clamp a smaller pipe directly to a much larger pipe can leave excessive clearance around the joint, making proper alignment and sealing difficult.
The most common solutions are an exhaust reducer, an adapter, or an expanded pipe end that allows the smaller section to fit inside the larger one.
Use an Exhaust Pipe Reducer or Adapter
An exhaust reducer is designed to connect two different pipe diameters through a gradual or stepped transition. For example, an adapter can connect a smaller exhaust pipe to a larger downstream section while providing enough overlap for clamping or welding.
A reducer or adapter is useful when:
- The two exhaust pipes have different outside diameters
- A replacement pipe does not match the existing connection size
- The exhaust system changes diameter between sections
- A removable connection is preferred
- A smoother transition is needed between different pipe sizes
Measure Both Pipe Diameters First
Before selecting an adapter, measure the outside diameter of both exhaust pipes. Do not rely only on the nominal size printed in a product description, especially when working with existing pipes that may have been expanded, reduced, or modified previously.
| Measurement | Why It Matters |
|---|---|
| Smaller Pipe OD | Determines the smaller side of the adapter |
| Larger Pipe OD | Determines the larger connection size |
| Available Overlap | Ensures enough engagement for a secure connection |
| Connection Location | Confirms there is enough space for the adapter and clamp |
Reducer vs Expanded Pipe End
A reducer is a separate component installed between two pipe sizes. An expanded pipe end, by comparison, modifies one exhaust pipe so the second pipe can slide directly into it.
| Feature | Reducer / Adapter | Expanded Pipe End |
|---|---|---|
| Separate Component | Yes | No |
| Pipe Modification Required | Usually no | Yes |
| Suitable for Different Diameters | Yes | Yes, within suitable expansion limits |
| Connection Style | Clamp or weld | Usually slip fit with clamp or weld |
Avoid Sudden or Poorly Matched Connections
The adapter should match both exhaust pipe sizes closely. A poorly matched connection can create alignment problems, insufficient overlap, or leakage around the joint.
For vehicle-specific exhaust systems, the transition also needs to fit the available space and maintain the intended routing. If the size difference is part of the original exhaust design, replacing the section with a correctly formed pipe may be more reliable than assembling several adapters together.
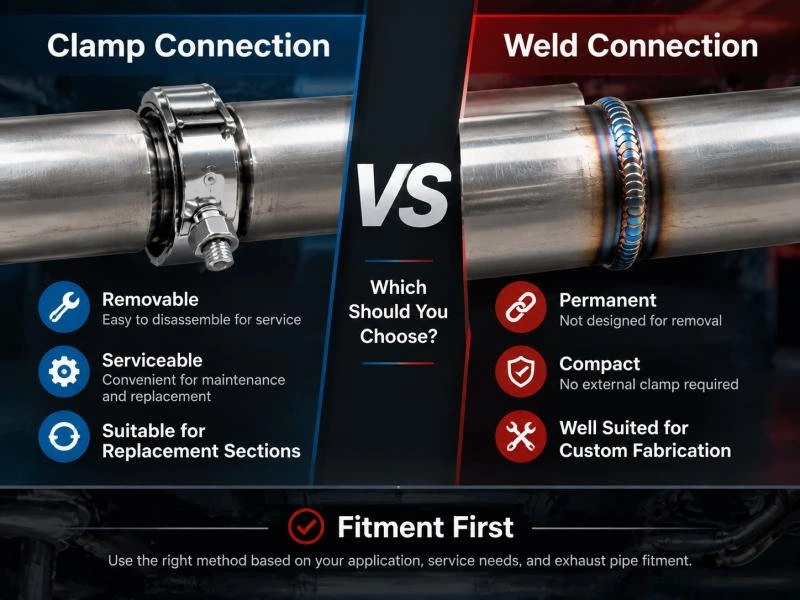
Clamp vs Weld: Which Exhaust Pipe Connection Is Better?
Both clamps and welding can create effective exhaust pipe connections, but they serve different purposes. The better option depends on whether the joint needs to be removable, how accurately the pipe sections fit together, and whether permanent fabrication is required.
| Factor | Clamp Connection | Welded Connection |
|---|---|---|
| Removable | Yes | No |
| Installation Equipment | Basic hand tools | Welding equipment required |
| Future Replacement | Easier to disassemble | Usually requires cutting |
| Suitable for Modular Sections | Yes | Less convenient |
| Permanent Fabrication | Not usually required | Well suited |
| Fitment Requirement | Correct clamp and joint geometry required | Accurate alignment required before welding |
Choose a Clamp When Future Removal Matters
A clamp connection is usually more practical when the exhaust section may need to be removed later for maintenance or replacement. Butt-joint clamps, lap-joint clamps, sleeves, and other removable connectors can make individual pipe sections easier to service.
Clamps are also useful when you want to avoid permanently modifying the exhaust pipe. However, the clamp must match the joint type and pipe diameter correctly.
Choose Welding for a Permanent Connection
Welding is more appropriate when the exhaust section is intended to remain permanently assembled. It is commonly used during custom exhaust pipe fabrication where individual tube sections, flanges, and brackets are combined into a finished component.
The pipe should already have the correct diameter, routing, and alignment before welding begins. Welding should not be used as a way to force poorly matched exhaust sections together.
Which Is Better for a Replacement Exhaust Pipe?
For many replacement applications, a removable clamp or flange connection can make future maintenance easier. If the original exhaust section was designed as a welded assembly, however, a properly fabricated replacement may also use welded joints as part of the finished component.
Simple decision guide:
- Need easy disassembly? Choose a suitable clamp, sleeve, or flange.
- Joining same-size pipes? Consider a butt-joint clamp, sleeve, or welding.
- Joining different pipe sizes? Use a correctly sized reducer, adapter, or expanded end.
- Building a permanent custom assembly? Welding may be more appropriate.
Fitment Is More Important Than the Joining Method
Regardless of whether the pipes are clamped or welded, the connection should not compensate for incorrect exhaust pipe geometry. Diameter, length, bend position, flange orientation, and hanger location all need to match the vehicle application.
If several adapters or major modifications are required simply to make the exhaust pipe fit, using a correctly designed replacement or custom exhaust pipe may provide a cleaner and more reliable solution.
How to Prevent Exhaust Leaks at the Joint
A secure exhaust pipe connection should hold the sections in position and minimize the chance of leakage around the joint. Most exhaust joint problems are caused by incorrect sizing, poor alignment, damaged pipe ends, or the wrong connection method.
Before tightening a clamp or completing a weld, make sure both pipe sections are clean, correctly aligned, and properly supported.
- Confirm the outside diameter of both pipes
- Use the correct clamp, sleeve, flange, or adapter size
- Remove heavy rust, burrs, and loose material from the joint area
- Keep both pipe sections aligned before tightening
- Position clamps over the correct part of the joint
- Check hangers and supports so the connection is not under unnecessary stress
Important: A clamp should secure a correctly matched joint. It should not be used to force badly misaligned or incorrectly sized exhaust pipes together.
Common Exhaust Pipe Joining Mistakes
| Mistake | Possible Result |
|---|---|
| Using the wrong clamp size | Poor sealing or insufficient clamping force |
| Using a lap-joint clamp on a butt joint | Incorrect pressure distribution and possible leakage |
| Ignoring pipe alignment | Stress on hangers, flanges, and surrounding exhaust parts |
| Over-tightening a clamp | Pipe deformation or difficulty removing the joint later |
| Connecting heavily rusted pipe ends | Weak joint and poor sealing |
| Using multiple adapters to correct poor fitment | More joints, greater complexity, and increased leak risk |
| Welding before checking routing | Permanent misalignment of the exhaust section |
If the pipe ends are badly corroded, deformed, or incorrectly positioned, replacing the damaged section may be more reliable than adding more clamps or adapters.
FAQ About Joining Exhaust Pipes
Can you join two exhaust pipes without welding?
Yes. Exhaust pipes can be joined without welding by using butt-joint band clamps, slip-fit connections, sleeves, couplers, flanges, or suitable exhaust adapters. The correct method depends on the pipe diameter and joint design.
How do you join two exhaust pipes of the same diameter?
Two same-diameter pipes can be joined end to end with a butt-joint band clamp, connected with a suitable sleeve, or welded together. Another option is to expand one pipe end to create a slip-fit connection.
Can one exhaust pipe slide into another?
Yes, but only when the receiving pipe has a sufficiently larger inside diameter or an expanded end. Two pipes with exactly the same outside diameter normally cannot slide directly into each other.
Is it better to clamp or weld exhaust pipes?
Clamps are generally better when the connection needs to remain removable, while welding is more suitable for permanent fabrication. The best choice depends on serviceability, pipe condition, fitment, and application requirements.
Can I connect exhaust pipes of different sizes?
Yes. Different-diameter exhaust pipes can be connected using a correctly sized reducer, adapter, expanded pipe end, or custom transition section. Both pipe diameters should be measured before selecting the connector.
Why does my exhaust pipe joint keep leaking?
Common causes include incorrect clamp size, poor pipe alignment, damaged or corroded pipe ends, insufficient overlap, loose connections, or using the wrong type of clamp for the joint.
Conclusion
There are several ways to join two exhaust pipes, and the correct method depends on the pipe diameter, joint design, service requirements, and whether the connection should remain removable.
Same-diameter pipes can use a butt-joint clamp, sleeve, expanded slip fit, or welded connection. Different-diameter pipes usually require an adapter, reducer, or properly formed transition. Flanges and V-band connections are useful when a secure but removable joint is required.
Regardless of the method, accurate measurement and correct fitment are more important than simply choosing the strongest clamp or most permanent connection. Pipe diameter, bend position, alignment, hanger location, and connection geometry should all match the vehicle application.
For damaged, heavily modified, or poorly fitting sections, using a correctly designed replacement or custom exhaust pipe may provide a cleaner and more reliable solution than adding multiple connectors or adapters.
AOSU supports OEM and custom exhaust pipe production based on vehicle information, drawings, samples, dimensions, and project requirements. For vehicle-specific or volume production needs, contact AOSU with your specifications for further evaluation.